Secrets
Lab Meta
Difficulty: Intermediate
Time: Approximately 15 minutes
In this lab you’ll learn how to use Docker Universal Control Plane (UCP) to create a secret and use it with an application.
You will complete the following steps as part of this lab.
Prerequisites
You will need all of the following to complete this lab:
- A UCP cluster comprising nodes running Docker 1.13 or higher
- The public IP or public DNS name of at least one of your UCP cluster nodes
- An account in UCP with permission to create secrets and deploy applications
Step 1: Create a Secret
In this step you’ll use the UCP web UI to create a new secret.
-
Login in to UCP (your lab instructor will provide you with account details).
-
From within UCP click
Resources>Secrets>+ Create Secret. -
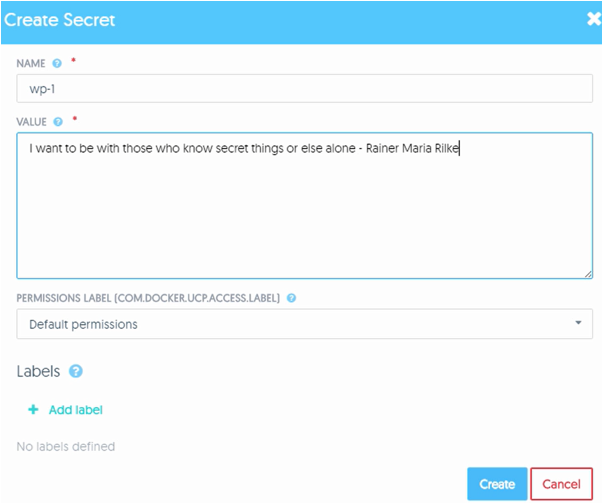
In the NAME field give the secret a name. The name is arbitrary but must be unique.
-
Enter a text string as the VALUE of the secret.
-
Leave all other options as their default values.
The screenshot below shows a secret called wp-1 with some plain text as the value of the secret.
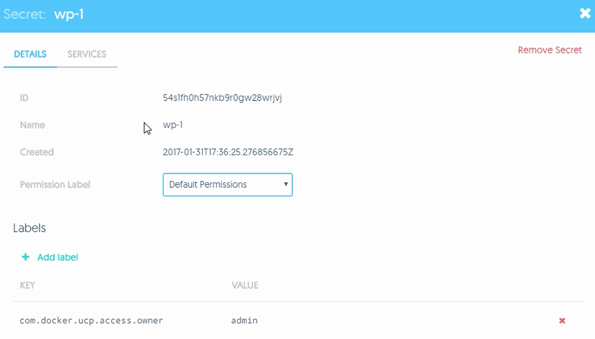
The screenshot below shows the DETAILS of the secret including its ID,
Name, and Permissions Label. Notice that you cannot view the value of the
secret from with in the UCP UI. This is because it is stored securely in the
cluster store. You can also click on the SERVICES tab to see any
services/applications that are using the secret. Right now there will be no
services using the secret.
Congratulations, you’ve created a secret. The next step will show you how to deploy an application that will use it.
Step 2: Deploy the App
In this step we’ll deploy a simple WordPress app. To do that we’ll complete the following high level tasks:
- Create a network for application
- Create a service for the front-end portion of the application
- Create a service for the back-end portion of the application
Perform all of the following actions from the UCP web UI.
-
Click the
Resourcestab >Networks>+ Create Network. -
Name the network wp-net and leave everything else as defaults.
-
Click
Createto create the network.
The wp-net is now created and ready to be used by the app.
-
Click
Servicesfrom within theResourcestab and then clickCreate a Service. -
Give the service the following values and leave all others as default:
- Details tab\SERVICE NAME: wp-db
- Details tab\IMAGE NAME: mysql:5.7
- Resources tab\NETWORKS: wp-net
- Environment tab\SECRET NAME: wp-1
- Environment tab\ENVIRONMENT VARIABLE NAME: MYSQL_ROOT_PASSWORD_FILE
- Environment tab\ENVIRONMENT VARIABLE VALUE: /run/secrets/wp-1
Let’s quickly cover the 6 values we’ve configured as per above. The service
name is arbitrary, but wp-db suggests it will be our WordPress database. We
are using the mysql:5.7 image because we know this works with the demo. We
are attaching the service to the wp-net network and we are telling it to use
the wp-1 secret we created in Step 1.
The application also needs to know where to find the secret that will give it
access to the database. It expects this value in an environment variable
called MYSQL_ROOT_PASSWORD_FILE. By default, Docker will mount secrets into
the container filesystem at /run/secrets/<secret-name>, so we tell the
application to expect the secret in the /run/secrets/wp-1 file. This is
mounted as an in-memory read-only filesystem.
-
Click
Deploy Nowto deploy the service. -
Deploy the front-end service by clicking
Servicesfrom within theResourcestab and then clickCreate a Service. -
Give the service the following values and leave all others as default:
- Details tab\SERVICE NAME: wp-fe
- Details tab\IMAGE NAME: wordpress:latest
- Resources tab\Ports\INTERNAL PORT: 80
- Resources tab\Ports\PUBLIC PORT: 8000
- Resources tab\NETWORKS: wp-net
- Environment tab\SECRET NAME: wp-1
- Environment tab\ENVIRONMENT VARIABLE NAME: WORDPRESS_DB_PASSWORD_FILE
- Environment tab\ENVIRONMENT VARIABLE VALUE: /run/secrets/wp-1
- Environment tab\ENVIRONMENT VARIABLE NAME: WORDPRESS_DB_HOST
- Environment tab\ENVIRONMENT VARIABLE VALUE: wp-db:3306
We are calling this service wp-fe indicating it is the WorPress front-end.
We’re telling it to use the wordpress:latest image and expose port 80 from
the service/container on port 8000 on the host - this will allow us to
connect to the service on port 8000 in a later step. We’re attaching it to
the same wp-net network and mounting the same secret. This time we’re
adding an additional environment variable WORDPRESS_DB_HOST=wp-db:3306.
This is telling the service that it can talk to the database backend via a
service called wp-db on port 3306.
- Click
Deploy Nowto deploy the service
The application is now deployed!
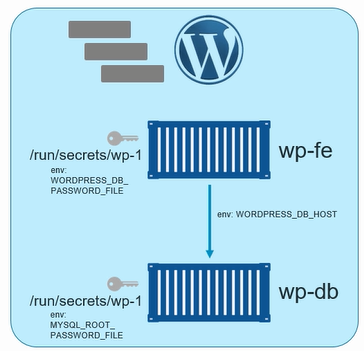
As shown in the diagram below you have deployed two services. wp-fe is the
application’s web front end, and wp-db is the application’s database back-end.
Both services are deployed on the wp-net network and both have the wp-1
secret mounted to a file called wp-1 in the /run/secrets in-memory
filesystem. You also inserted environment variables into each service telling
them things like where to find the database service and where to find the
secret.
You also published the web front end portion of the application (the wp-fe
service) on port 8000. This means that you should be able to connect to the
application on port 8000 of any of the nodes in your DDC/UCP cluster.
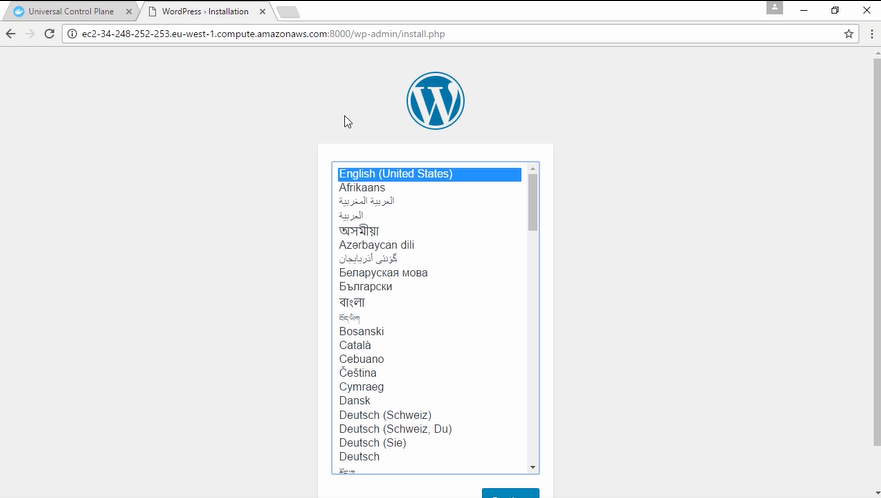
Step 3: Test the Application
In this step you will use a web browser to connect to the application. You will know the application is working correctly if the web page renders correctly and there are no database related errors displayed.
- Open a web browser and point it to the public IP or DNS name of any of the
nodes in your UCP cluster on port
8000
NOTE: Your lab instructor will be able to give you details of the public IP or public DNS of your UCP nodes.
Step 3: View the Secret
In this step you’ll log on to the terminal of the container in the web-fe
service and verify that the secret is present.
Perform all of the following steps from within the UCP web UI.
-
Click the
Resourcestab >Servicesand click on theweb-feservice. -
Click the
Taskstab. -
Click the running task (there will only be one).
-
Click the
Consoletab for the task. -
Make sure that the command to run is showing as
shand then clickRun.
You are now on the terminal of the web-fe service’s container.
-
Run the following command to verify that the secret file exists.
 # ls -l /run/secrets/
 total 4
 -r--r--r--  1  root  root  81 Mar 17 10:20   wp-1
The /run/secrets/ directory is mounted read-only as an in-memory
filesystem that is only mounted into this container and using reserved
memory on the Docker host. This ensures it’s contents are secure.
-
View the contents of the secret.
 # cat /run/secrets/wp-1
 I want to be with those who know secret things or else alone - Rainer Maria Rilke
The contents of the secret are visible as unencrypted plain text. This is so that applications can use them as passwords. However, they are issued to the container via a secure network and mounted as read-only in an in-memory filesystem that is not accessible to the Docker host or other containers (unless other containers have also been granted access to it).
Congratulations, you have completed this lab on Secrets management.